
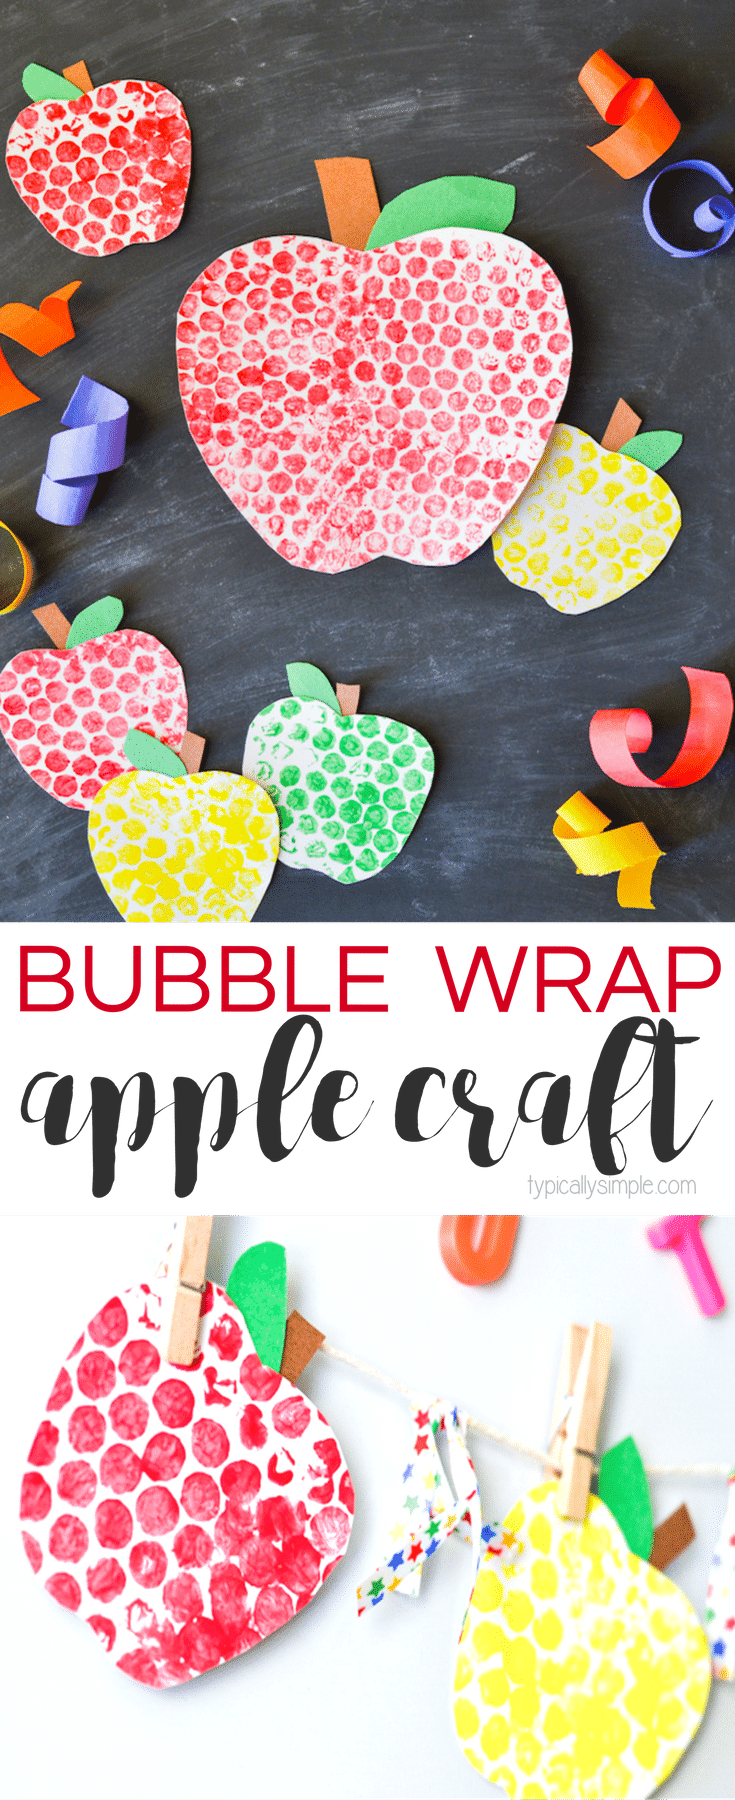
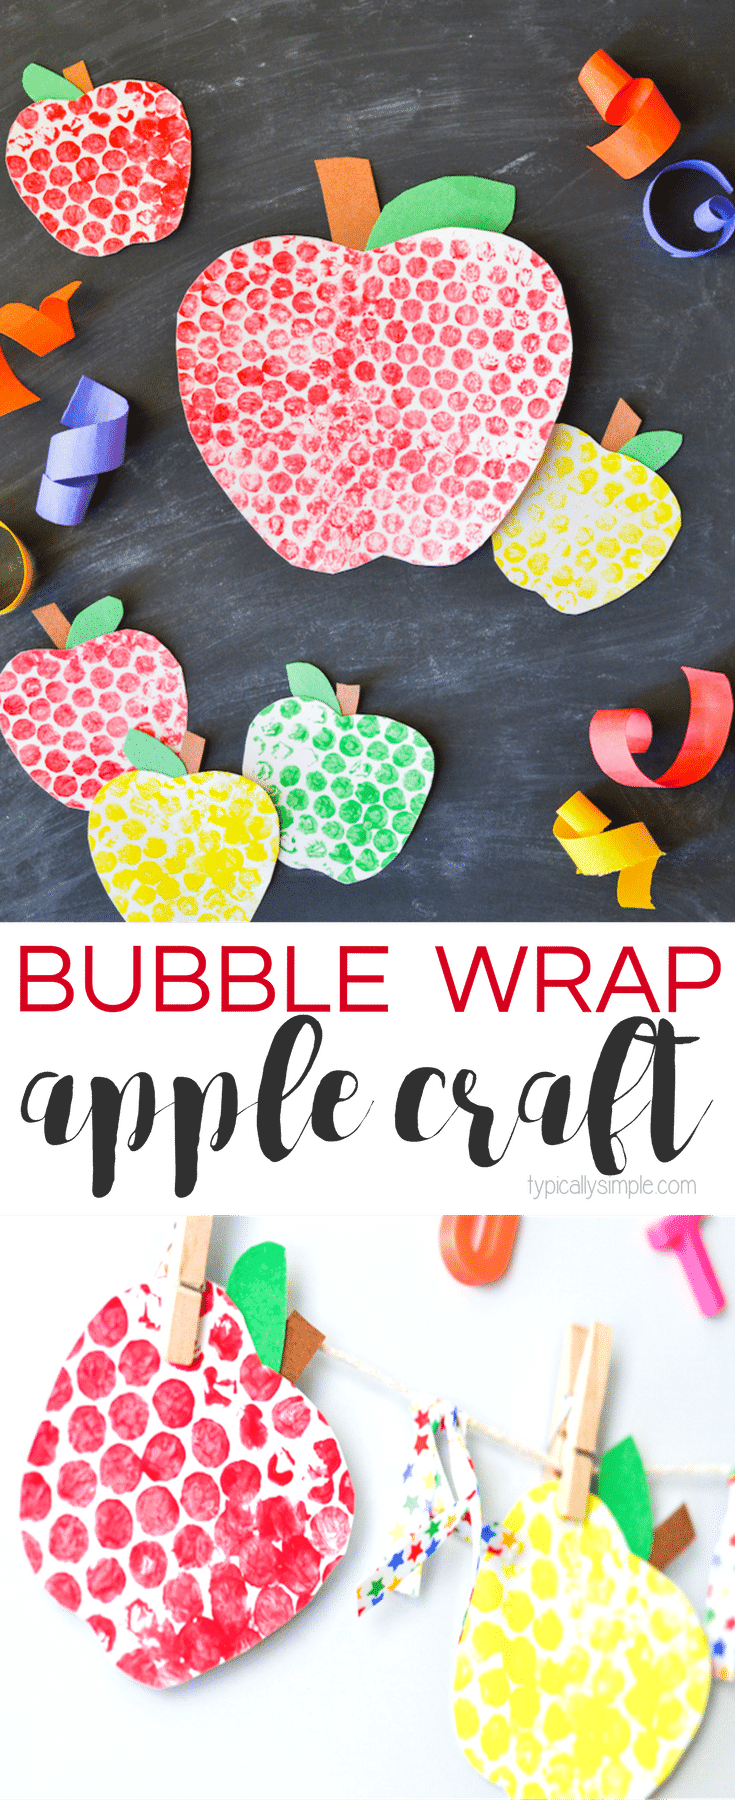
With back-to-school in full-swing and fall not too far behind, it’s time to start thinking about all things apples! These cute bubble wrap painted apples only need a few supplies and are so much fun to make with the kids!
My little guy loves to paint and do art projects, but I can only handle so many painting projects that turn into brown blobs because he has to use every single color. So I like to fill up a little paint palette for him which helps limit how much paint he can use at once. It was perfect to use for these bubble wrap painted apples because I didn’t want to end up with a bunch of brown, rotten looking apples!

How To Make Bubble Wrap Painted Apples
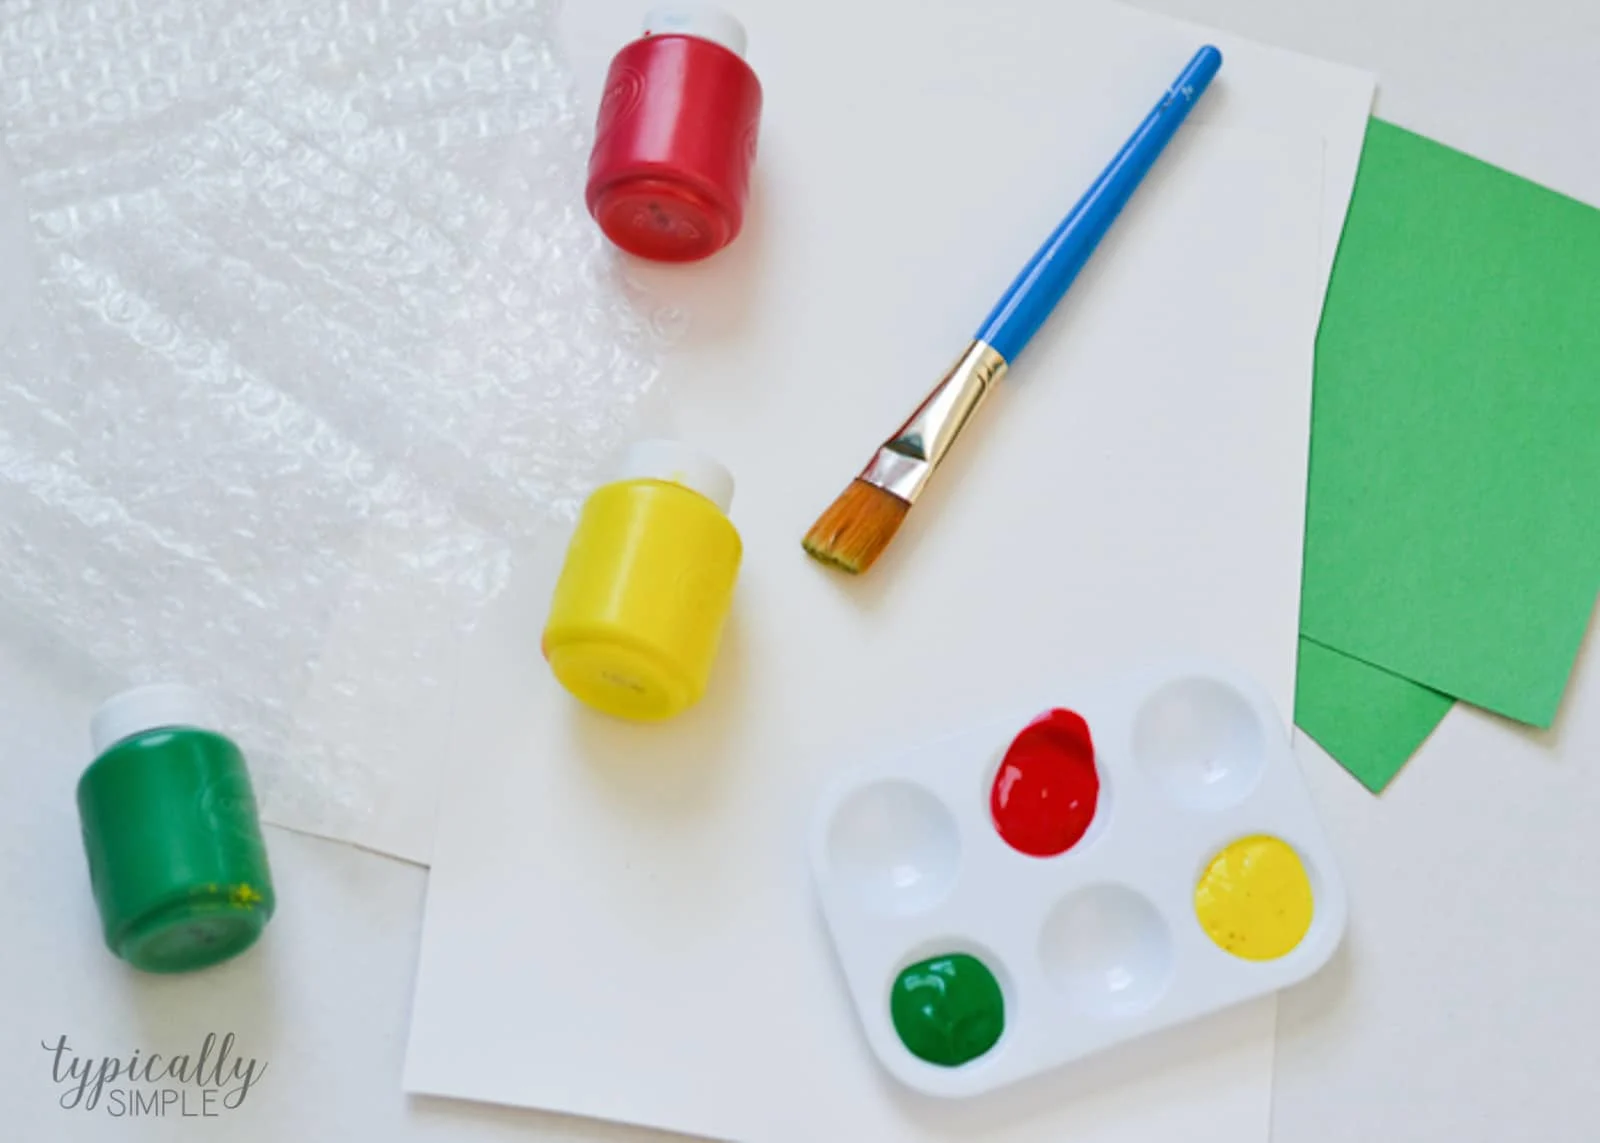
Materials
bubble wrap
construction paper
tempera paint
paint brush
apple template
scissors & glue

Directions
Start by cutting the bubble wrap into small square pieces that are easy for the kiddos to hold.
Choose a color and paint it onto the bumpy side of the bubble wrap so it just covers the tops of the bubbles. Then press the bubble wrap paint side down onto a piece of white construction paper and lift up.
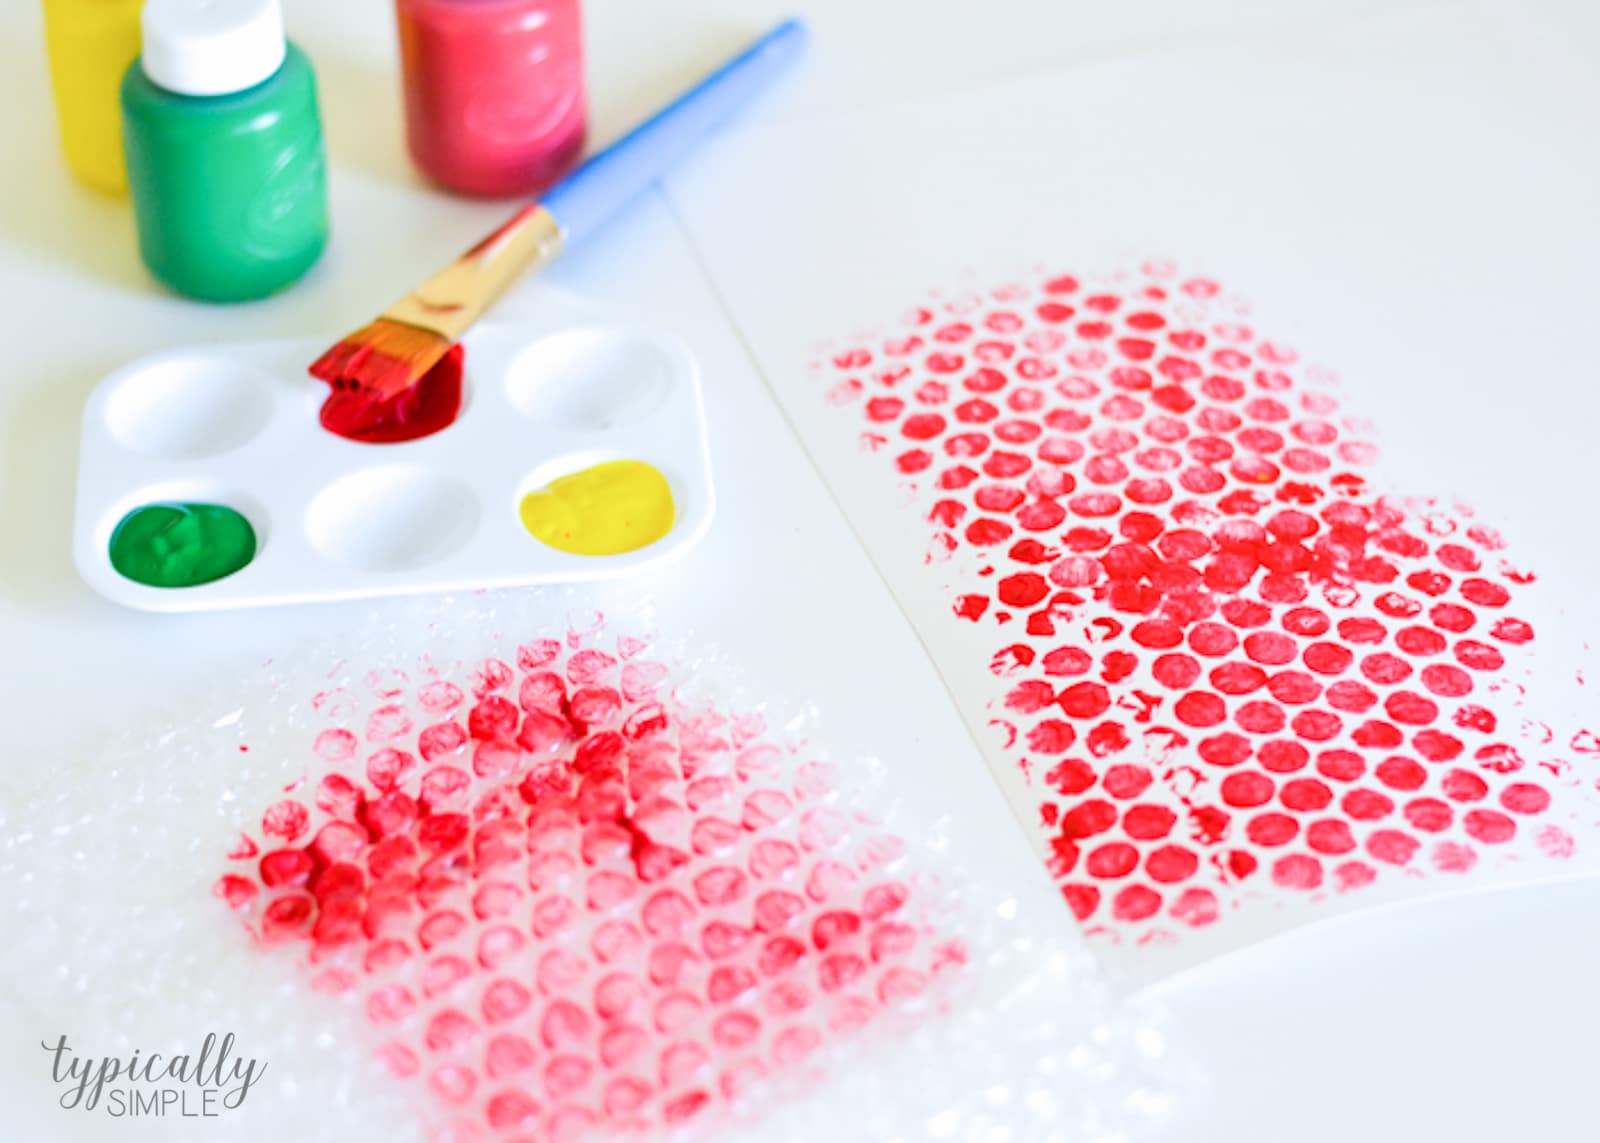
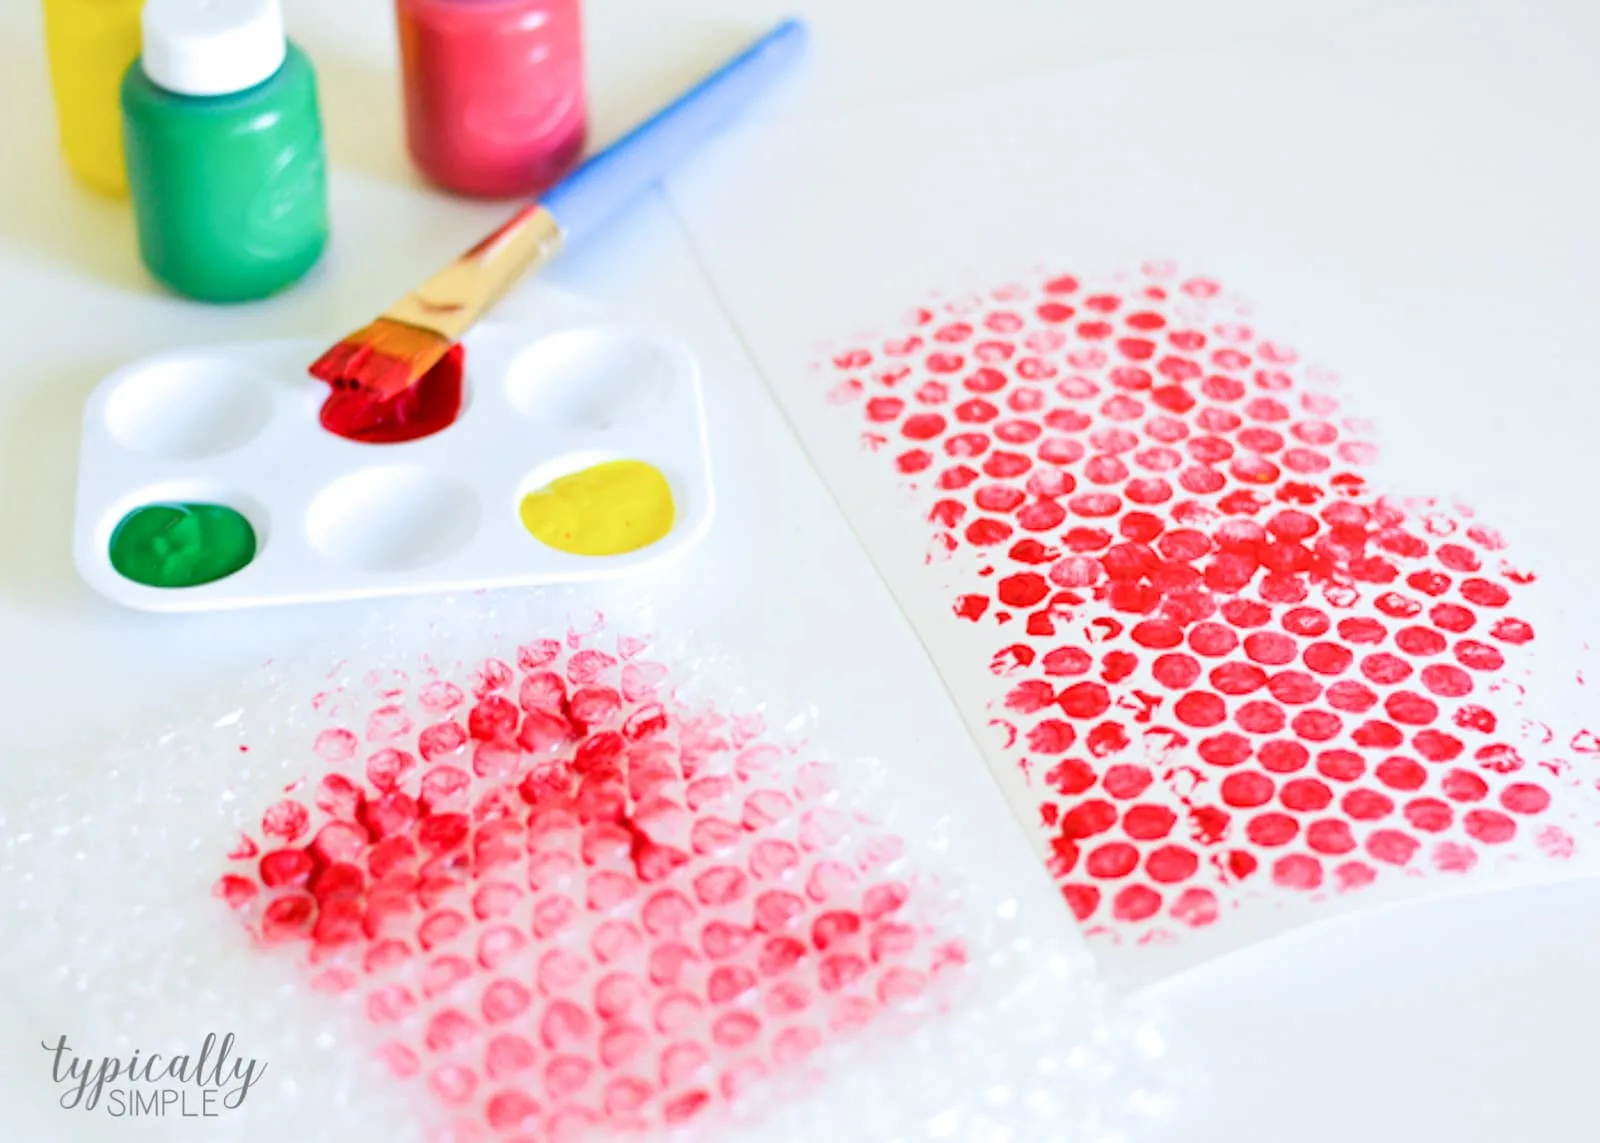
Continue painting, pressing, and lifting until the paper is covered with the bubble wrap print. Set the painted paper aside to dry for a few minutes.
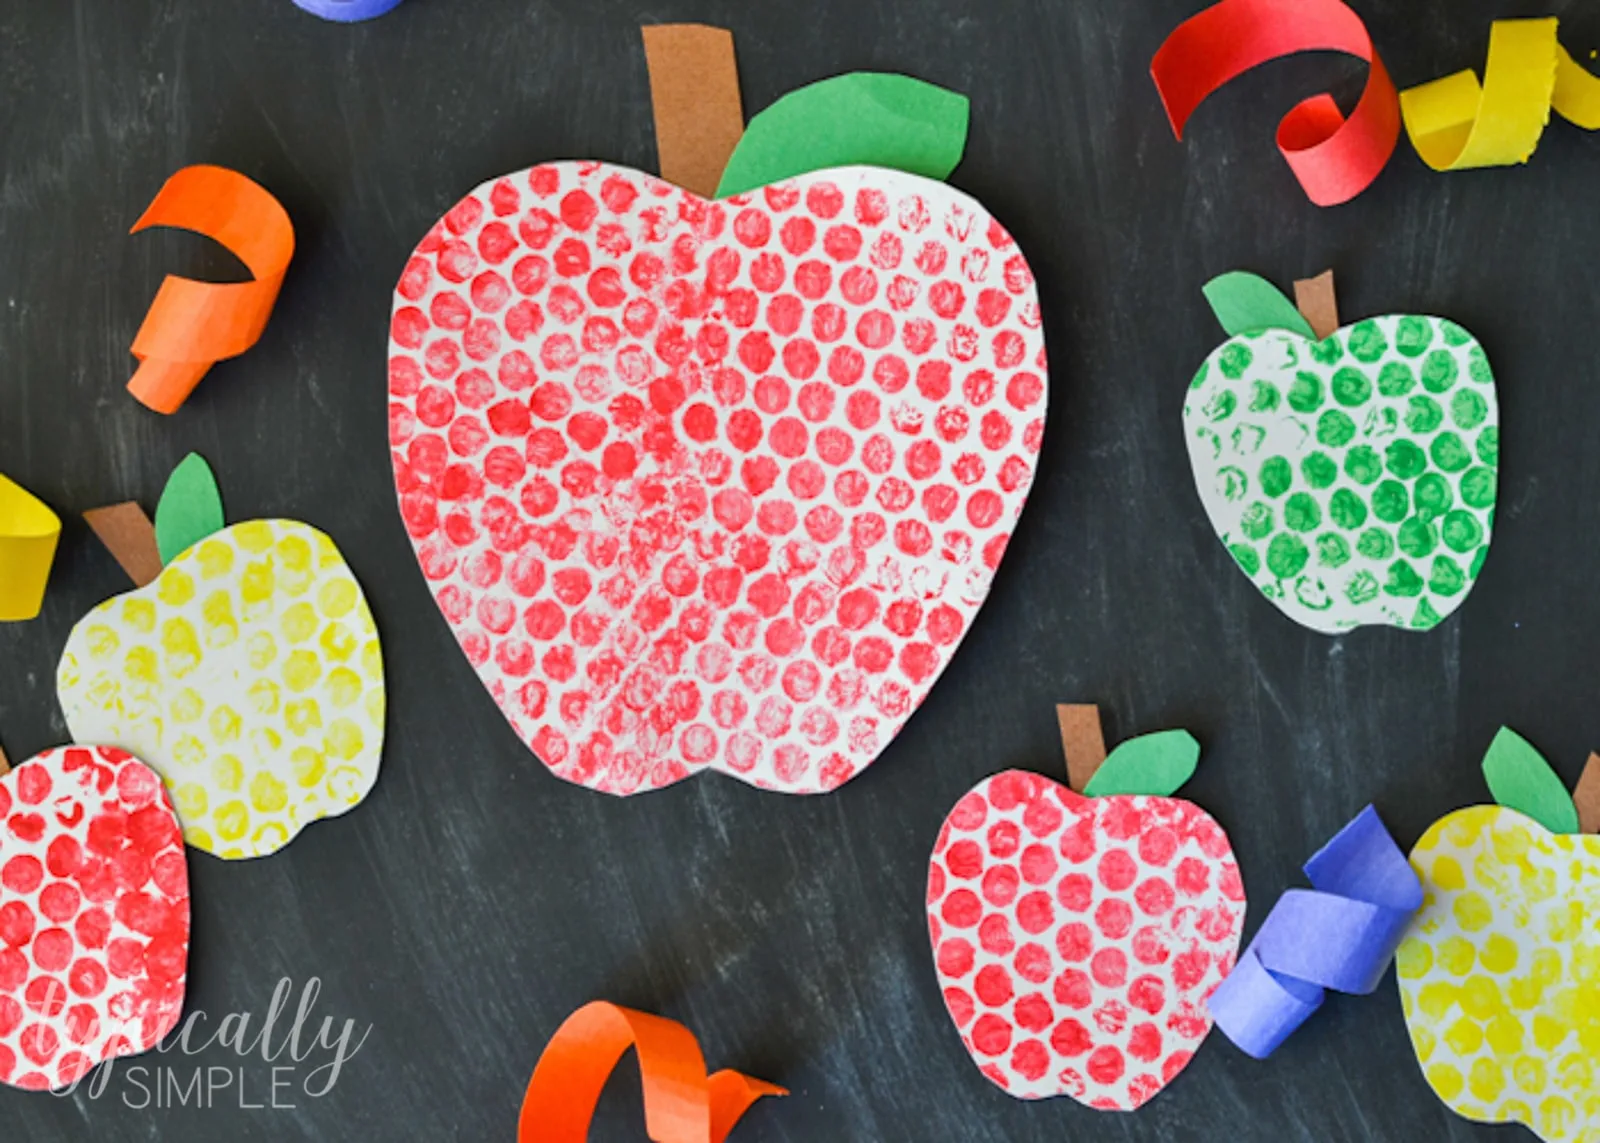
Once the paint is dry, trace apple shapes onto the paper and cut out. Add some stems and leaves to the apples using construction paper.
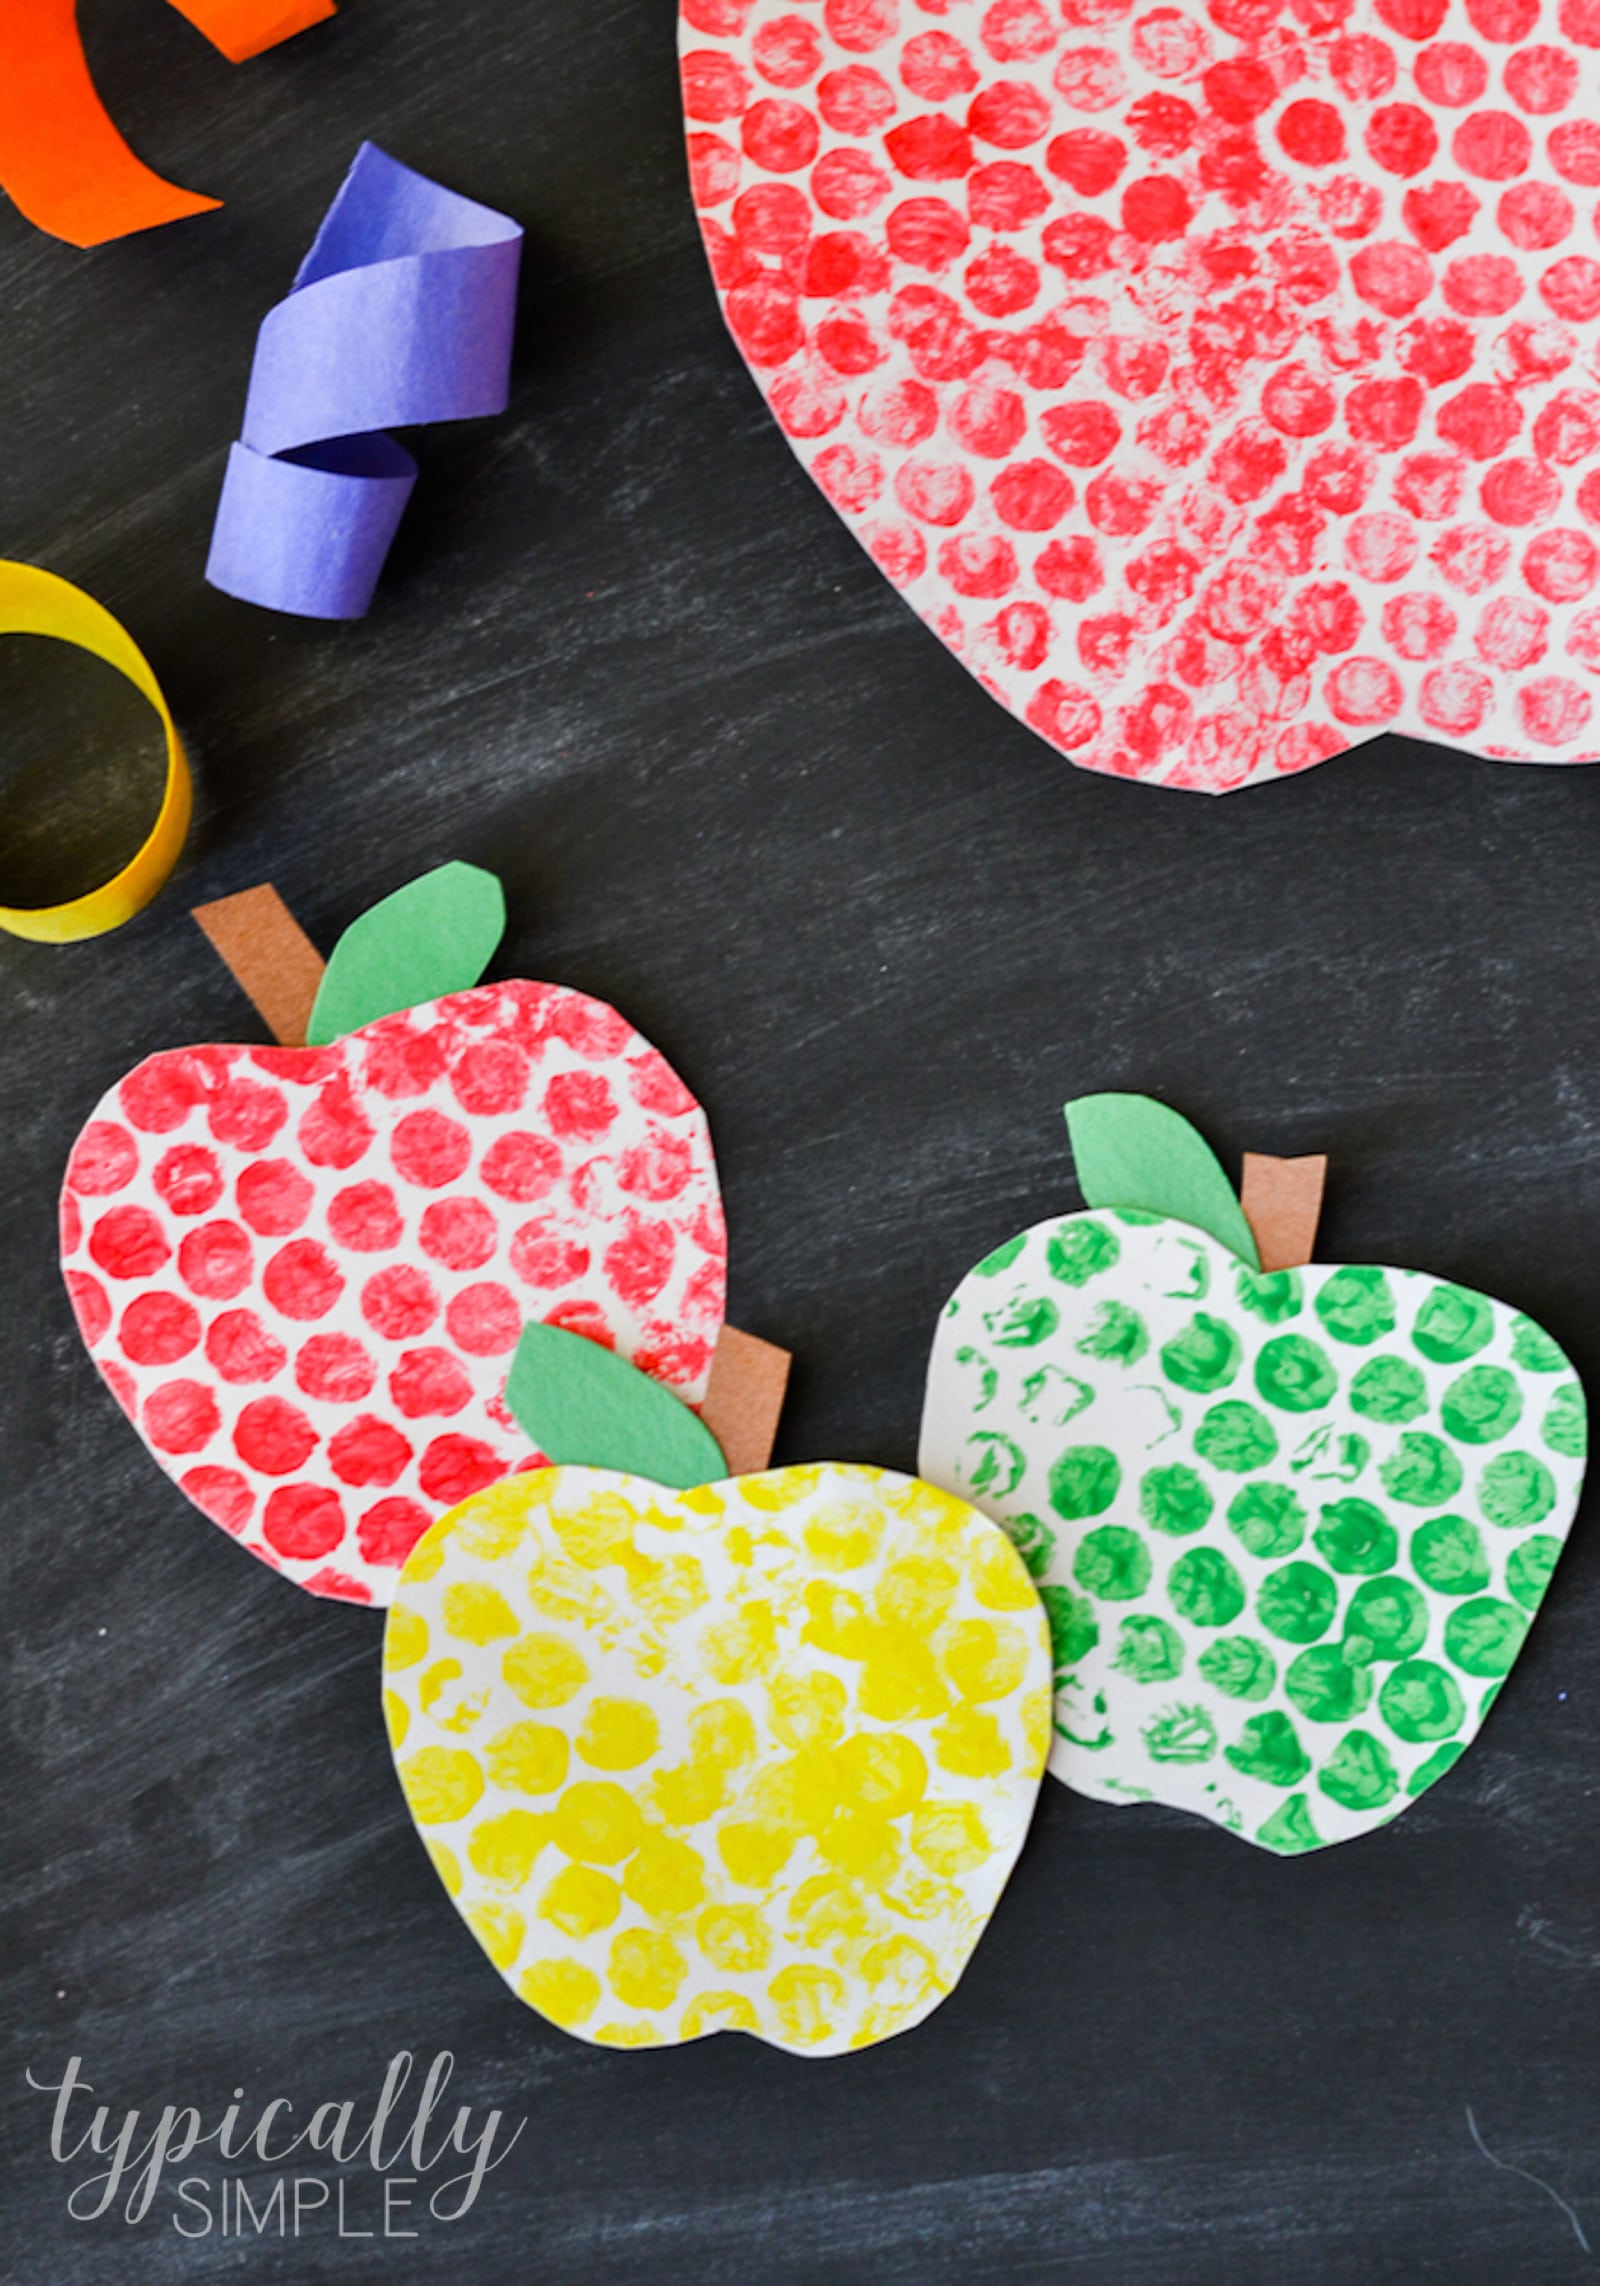
 The apples make such cute decorations for a classroom or playroom! I just love the texture from the bubble wrap. Plus the kids will have lots of fun experimenting with different patterns, colors, or even sizes of bubble wrap.