
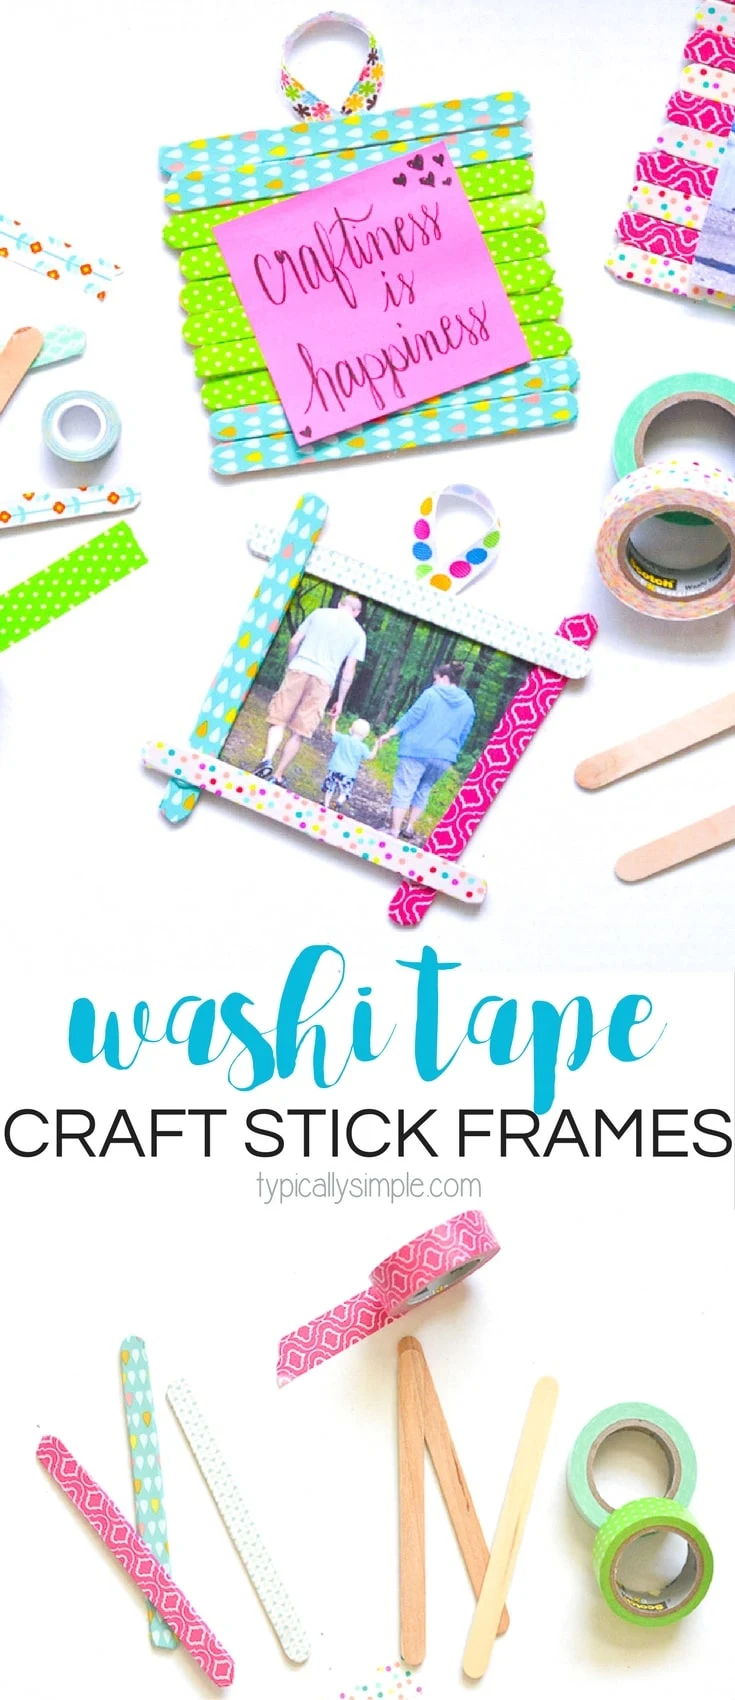
These washi tape craft stick frames are a fun craft project for both kids and adults! Just a few basic craft supplies are all you need to make these colorful photo frames!

Continuing my effort to use up all of those craft sticks I have stashed away, I’ve been trying to make a few crafts that are fun for both adults and kids.
I remember making so many different types of popsicle stick crafts when I was a kid, complete with all of that ooey gooey white glue oozing out of the sides because less is not more when you are an 8 year old trying to glue something together!
So I decided to give the classic craft stick photo frame a bit of an upgrade with some washi tape! Because along with craft sticks, I also have an abundance of colorful washi tape in my craft stash.
I usually pick up a roll here and there at the store, but I’m also a big fan of supporting small businesses. One of my favorite Etsy shops for finding fun washi tape is Raindrop Washi Shop. There are SO many fun choices available, including coordinating sets or my favorite – Pick Your Own – where you can pick ten of your favorite prints, perfect for a project like these craft stick frames!
How to make Washi Tape Craft Stick Frames
Supplies
craft sticks
washi tape
scissors
hot glue gun & glue sticks
ribbon
favorite photos
Directions
Start by covering the craft sticks with washi tape. An easy way to do this is unroll and tear off a length of washi tape that is a bit longer than the craft stick. Place it on the table sticky side up, put a craft stick on top then fold the washi tape edges onto the other side of the craft stick.

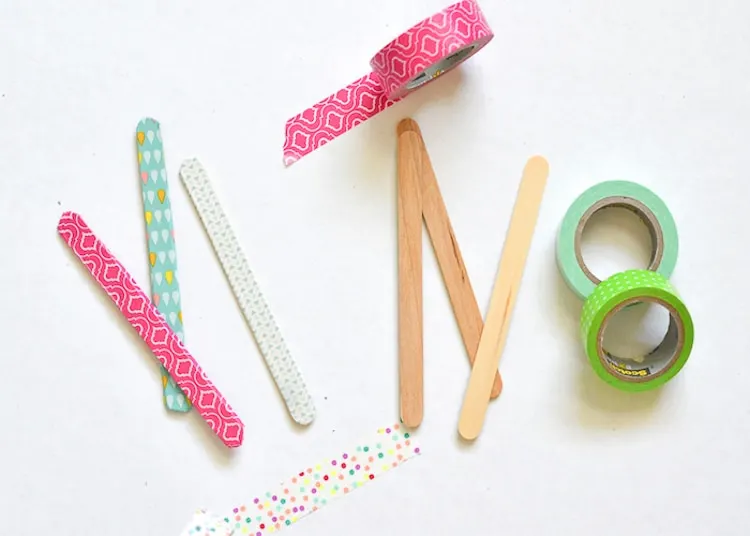
Continue this process until you have the number of craft sticks covered to make the frame that you would like to use for your photos.
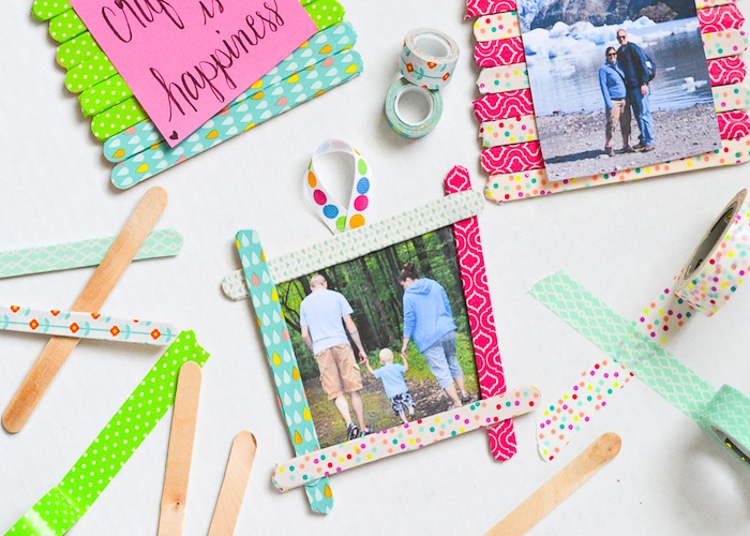
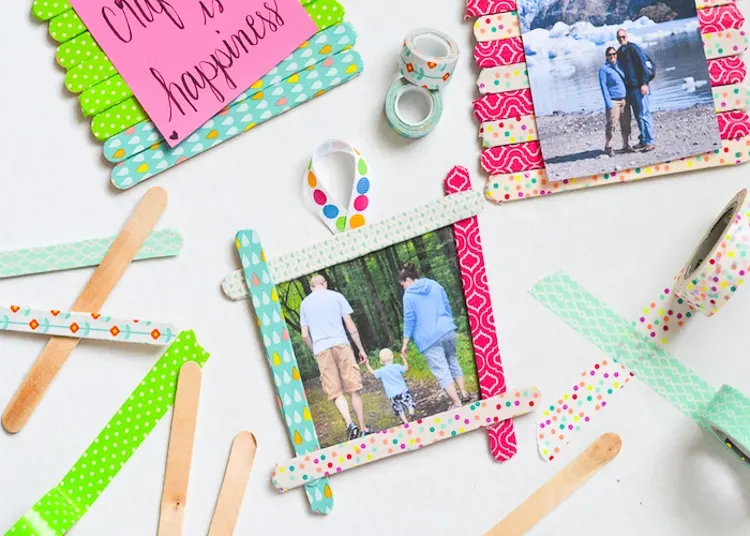
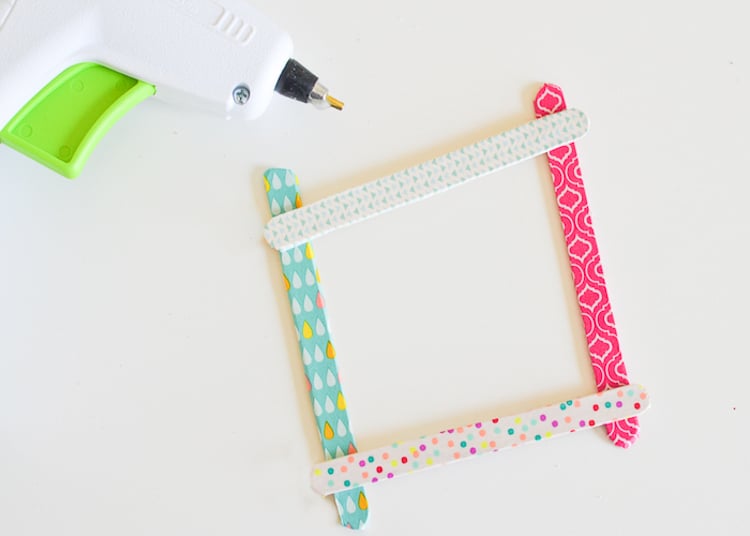
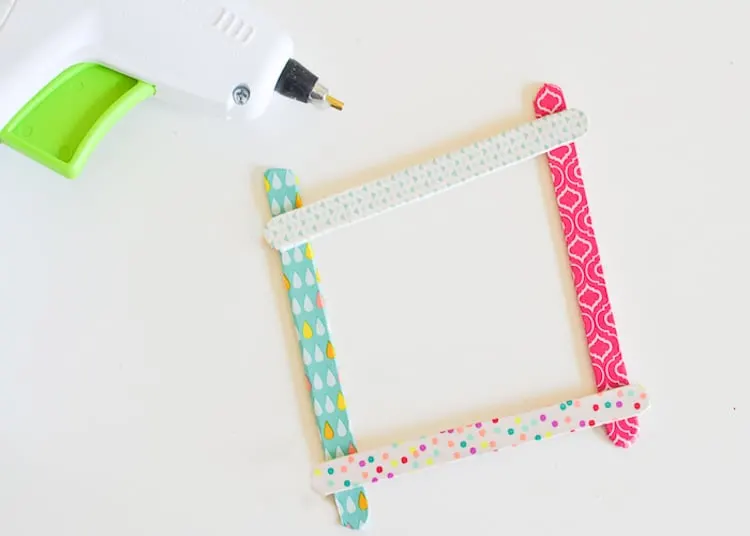
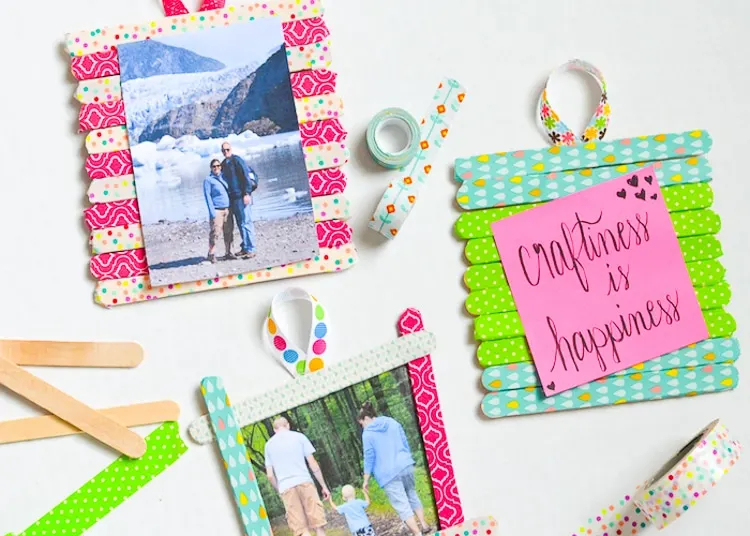
I decided to make two types of frames – the usual four craft stick square shaped frame with an opening for the photo and a pallet-inspired frame.
To make the opened faced frame, take one of the craft sticks and add a dab of hot glue at the end. Then attach two of the together, continue until you create a frame. If you are making this project with younger kids, I would recommend either having them used a low temp glue gun with supervision or letting the adult do this part.
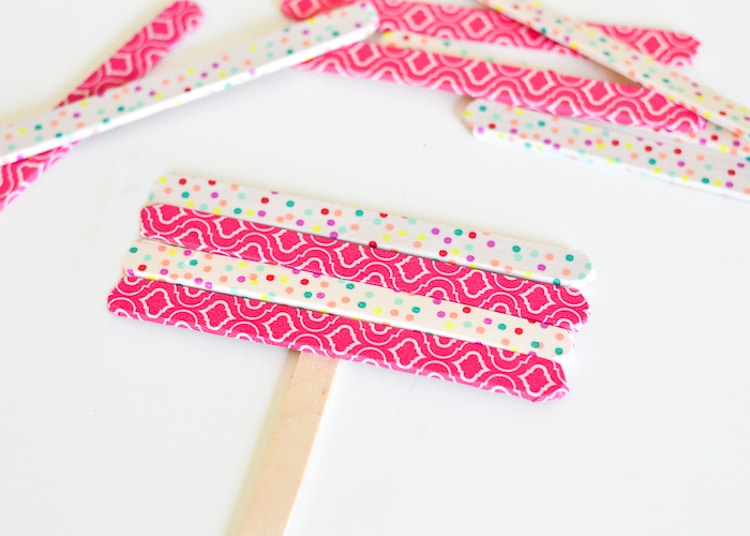
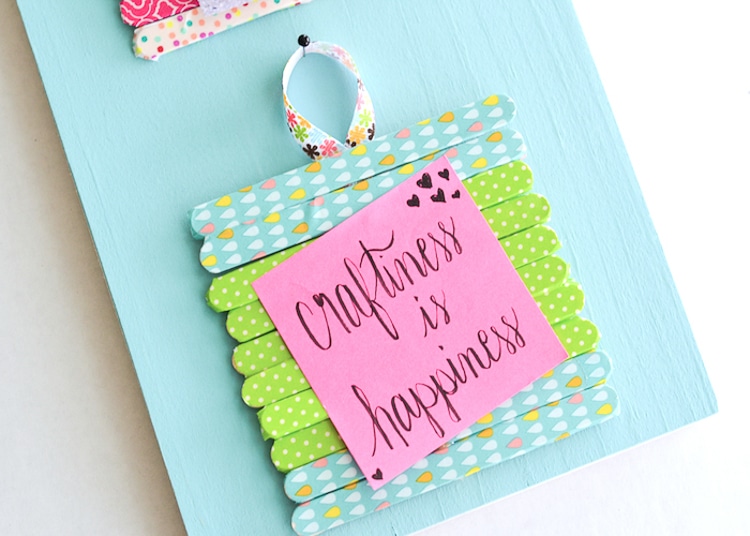
Now to make the pallet-inspired frame, I used one plain craft stick as the base and glued washi covered craft sticks on top of it until the whole length was filled in.

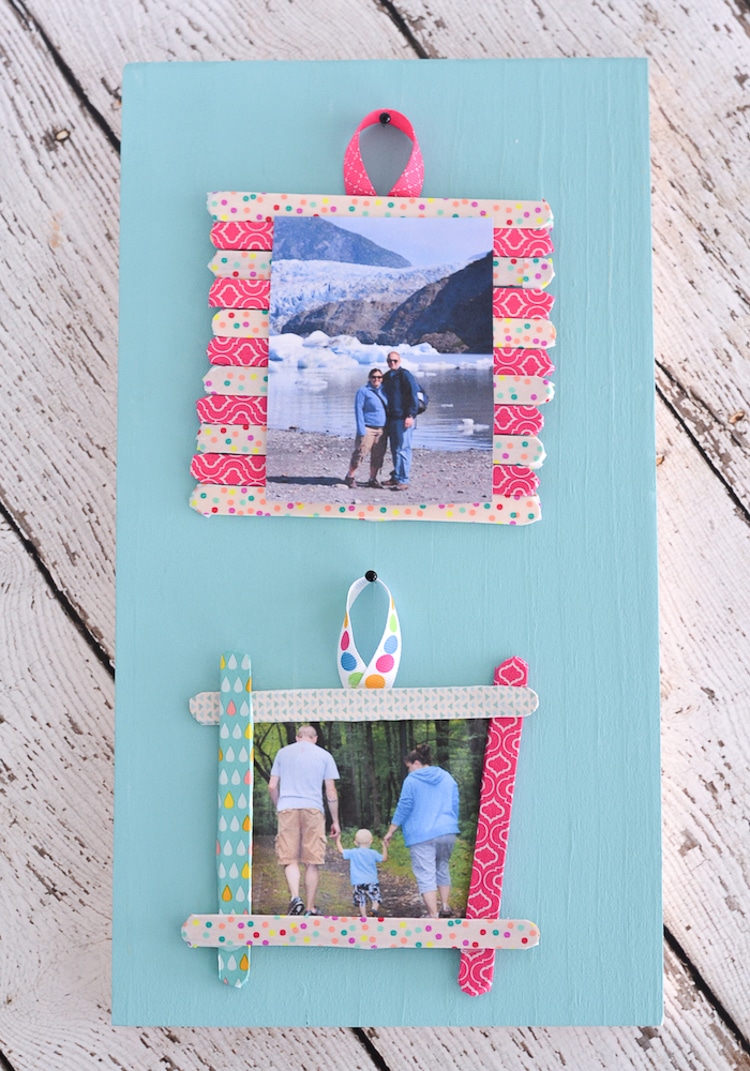
And to finish the frames off, attach a piece of looped ribbon to the back to use as a hanger and add your favorite photos!
I decided to take it a step further and hang these on a painted board that’s been sitting in my craft room with no real plans. I just hammered in two small nails and it became a fun display piece for these bright craft stick frames!

These craft stick frames are also a great way to show off little notes, quotes, or small drawings the kids make. Since I’ve been practicing my hand lettering, I wrote out a quote on a sticky note to attach to one of the frames to display in my craft room!

These frames would be such a fun craft to make as a family on a rainy day or even use as a homemade gift for Mother’s Day.

This project idea was first published on Somewhat Simple.