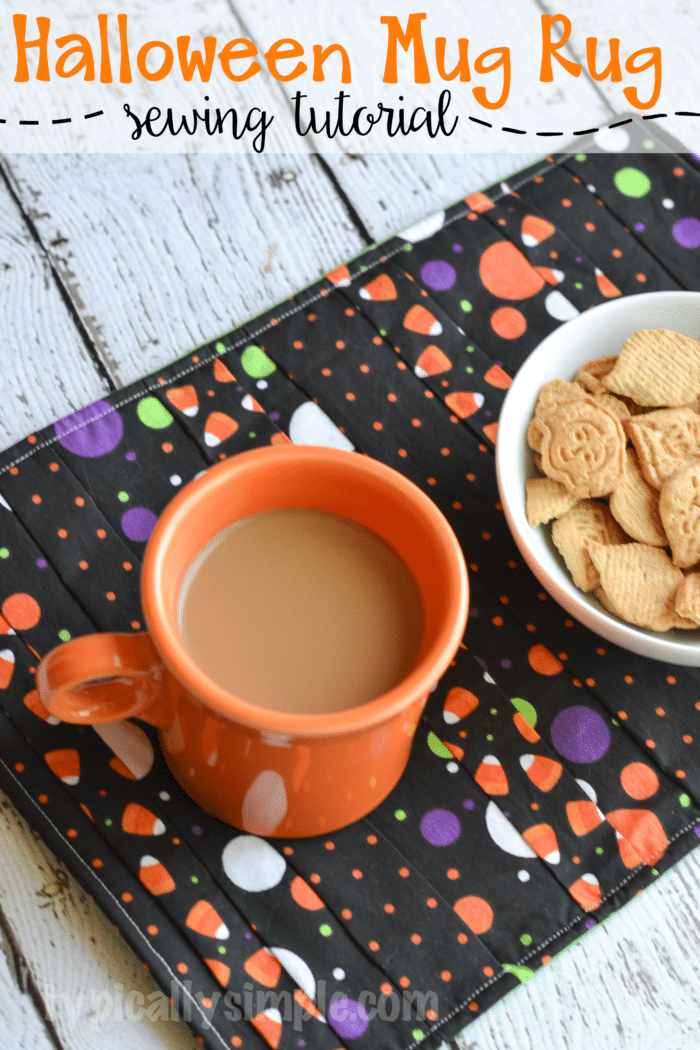
Halloween Mug Rug Sewing Tutorial
This Halloween Mug Rug sewing tutorial is a fun project to make using fabric scraps!
 I have a fun, little sewing tutorial to share with you! I love, love, love to sew. But so often I feel like I don't have enough time to work on a project from start to finish. I received a new sewing machine for Christmas last year and I'm trying to make a point of using it more. So I've decided to sew my little guy's Halloween costume this year!
To get some practice in with the new machine, I've been doing a few small sewing projects here and there during nap time. And I have a goal to make my little guy a quilt when he moves into a big boy bed, so I thought it would be fun to work on a smaller sized project that is similar to making a quilt.
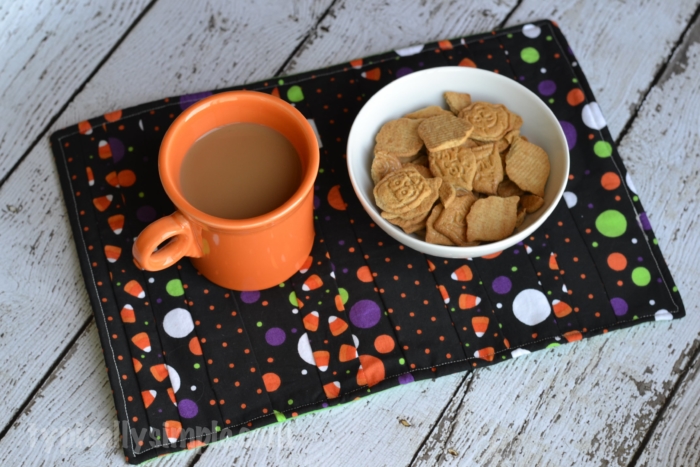
Enter the mug rug. It's bigger than a coaster but smaller than a placemat. It's perfect for a cup of coffee and a little bowl of snacks. I love having it on my desk when I'm working, especially when I have a glass with a cold beverage and it starts to leave drips of water all over. And with Halloween right around the corner, I decided to make a mug rug with my Halloween themed fabric!
Supplies
sewing machine, thread, pins, scissors
strips of fabric
backing fabric
cotton batting
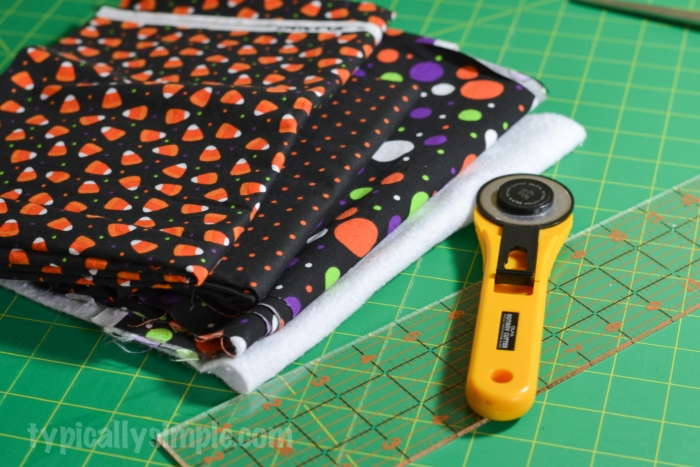
Start by deciding the size of your mug rug - the finished size of mine is 12x14 inches. So I cut my strips to be 15 inches long and varying widths of 1-2.5 inches.
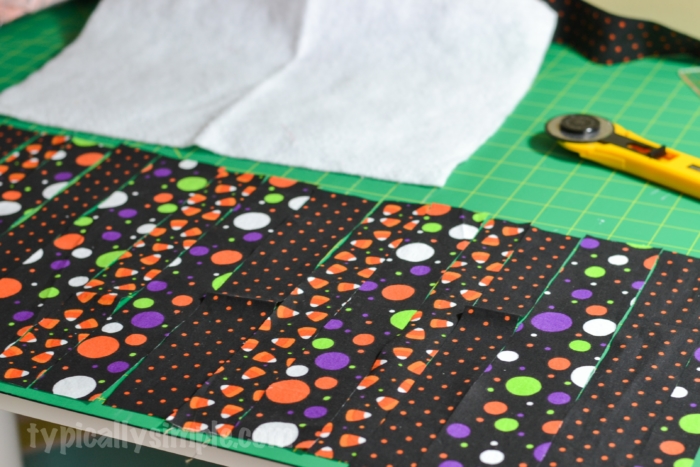
Cut enough strips of fabric to make it double the width of your finished mug rug size. So when I laid all of my fabric strips out on the table, it was about 30 inches wide. This will give you enough seam allowance when you start sewing them all together.
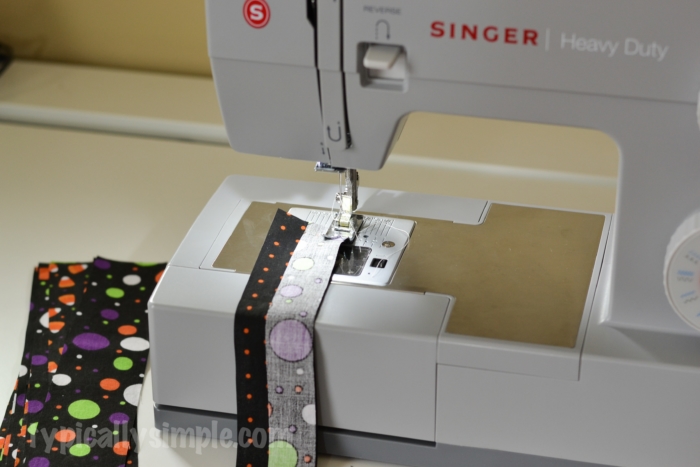
Start sewing the fabric strips right side together. It helps to press the seams after sewing a few together so they lay flat and are easier to work with.
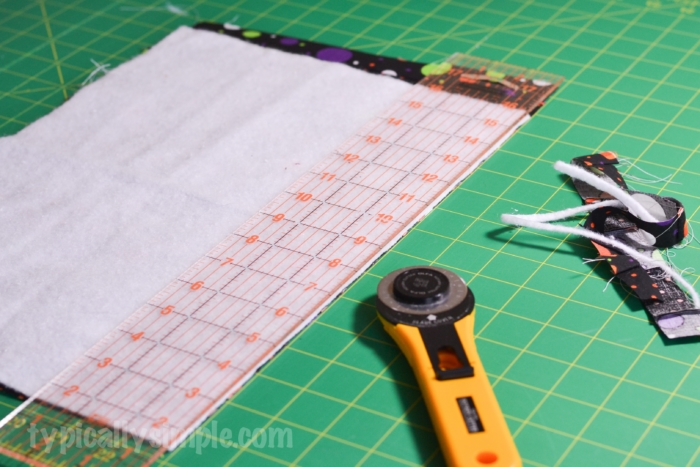
After all of the strips are sewn together, trim off any excess fabric by squaring it up to the piece of batting.
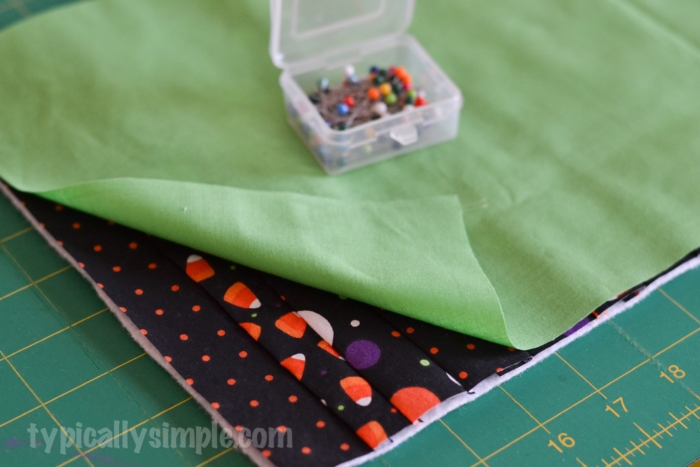
Sandwich the batting, backing, and top of the mug rug together - you will want the batting on the bottom and then the backing & top right side together. Pin everything and sewing around the edges leaving a 2-3 inch opening so you can turn the project right side out.
After turning the project right side out - you can read more about this step in my placemat sewing tutorial - iron and sew around the edge of the mug rug.
A quick project that is perfect for an afternoon of sewing. I was able to get this whole project done from start to finish while my little guy was at preschool. I can't wait to make a few more in different sizes and fabric prints for other holidays and seasons!
Make your favorite cup of coffee or tea and grab a little bowl of snacks and you are set! Have you all tried the Star Wars graham crackers yet...they are SO good. There's something about them that makes them tastier than a regular graham cracker.