
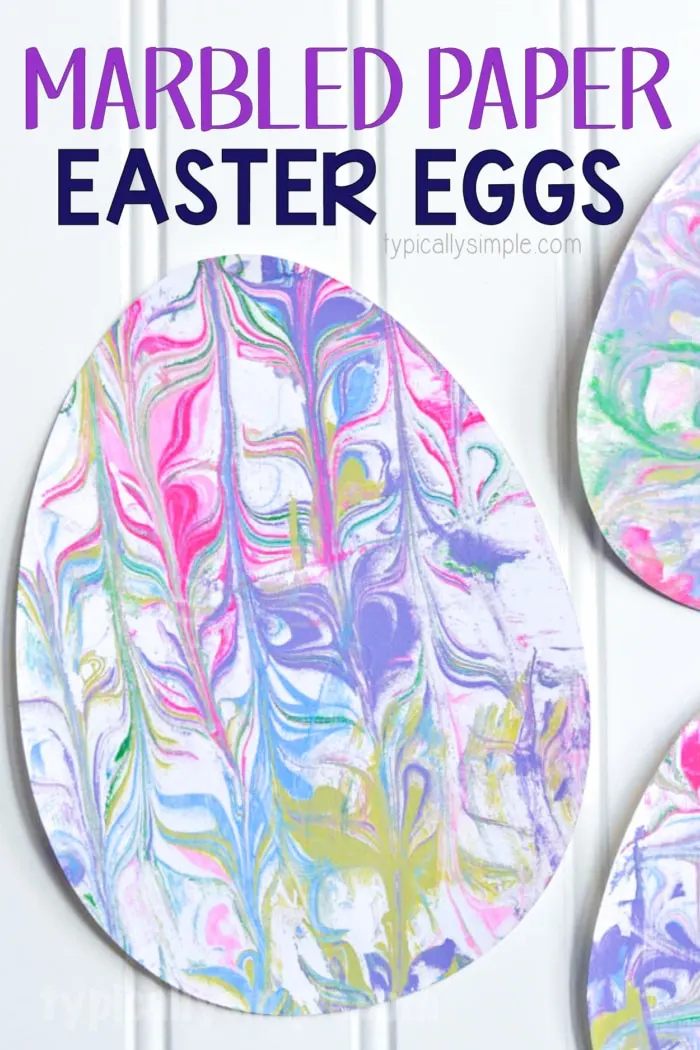
If your kiddos enjoy getting a little messy when crafting, then making these marbled paper Easter Eggs with shaving cream is the perfect craft project for them!

Spring is such a fun time of the year…the weather is finally starting to warm up (hopefully!) and I love crafting with all the pretty pastel, spring colors. Everything is so fresh and new again. I also love making decorations the spring holidays – St. Patrick’s Day is one of my favorites, and of course Easter!
This is a great craft to make on a rainy (or snowy) day and the marbled paper technique can be used for other shapes, too!
Supplies
shaving cream
card stock cut into egg shapes
acrylic paint
art tray or box lid
paintbrush, toothpick, or fork
newspapers & paper towels
scraper tool
How to Make Marbled Paper Easter Eggs
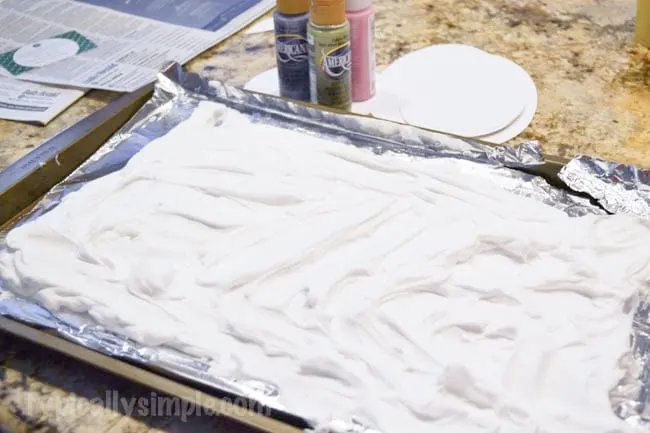
Right away this craft gets messy! Spray shaving cream onto a tray or box lid and have the kids spread it around. I actually used a cookie sheet lined with tin foil to make clean-up a little easier.

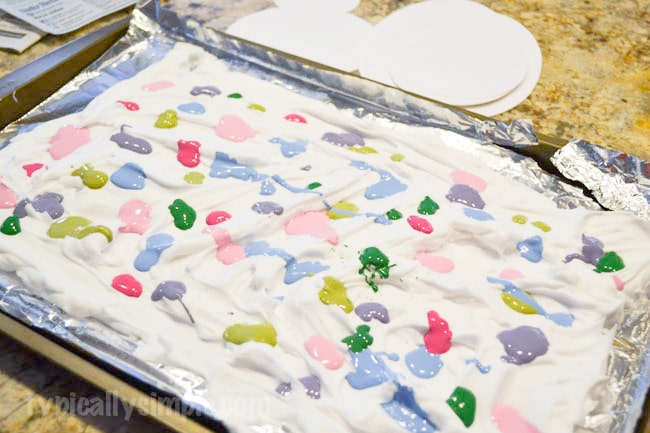
Let the kids decide on the colors of paint they want to use for their marbled paper and squirt it on top of the shaving cream. Make paint drops, lines, squiggles…be creative!

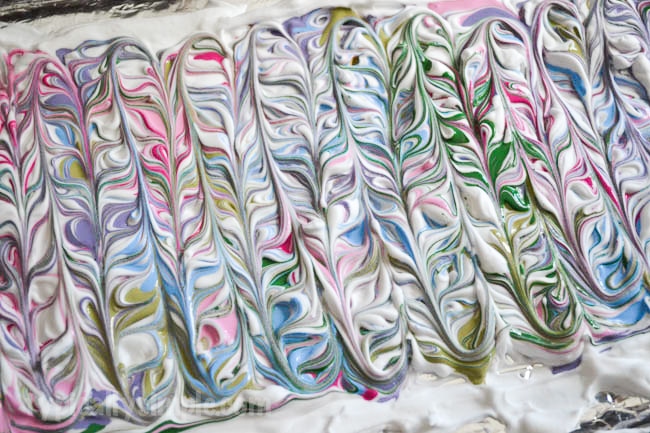
Then using a toothpick or another pointy tool (fork, paintbrush) start dragging the paint through the shaving cream. Make straight lines back and forth. Then do it again, but this time go up and down to start creating a marbled look.
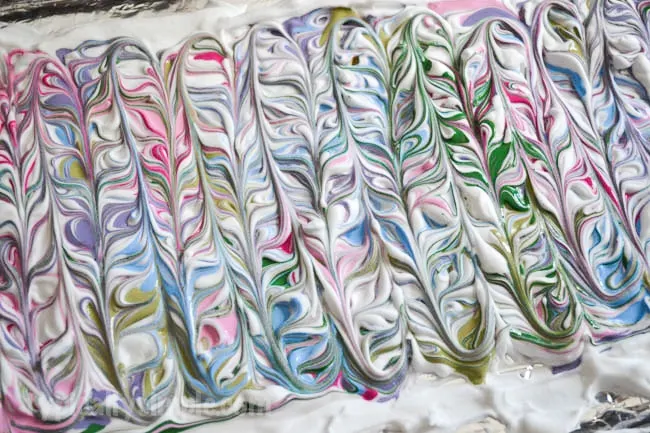
Now time to get messier! Younger kids could need a little help with this step. Take the paper egg and place it on top of the shaving cream. Apply a little pressure to push it down into the paint & shaving cream, then pull it up and place on newspaper for a few minutes.

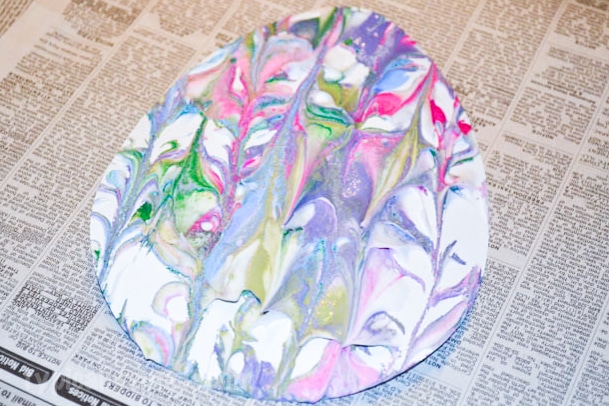

Using some sort of scraper tool (I used an old gift card) scrape off the shaving cream and let the paint dry for a bit.
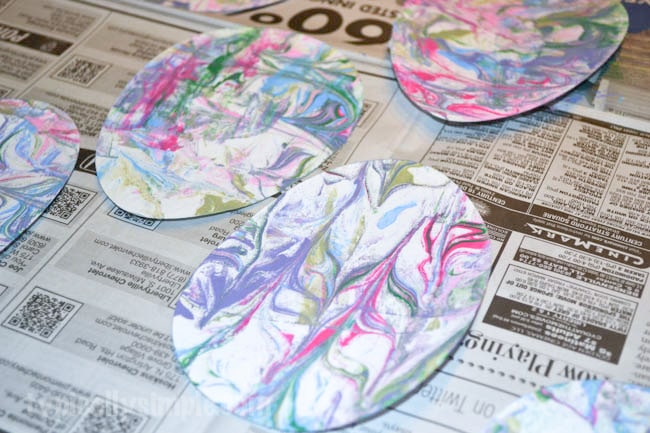


As you make more Easter eggs, the paint will start to become less marbled looking and more blotchy looking…but it still looks fun and I bet the kids won’t mind too much!

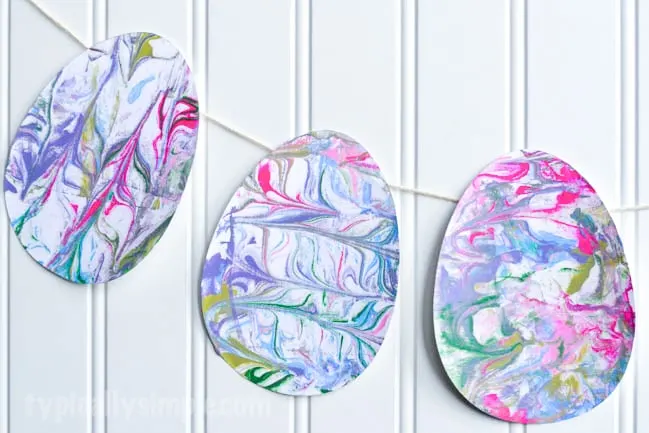
Once the paint has dried, display your eggs for Easter. I attached mine to some twine to make a little Easter banner to hang up in our house.
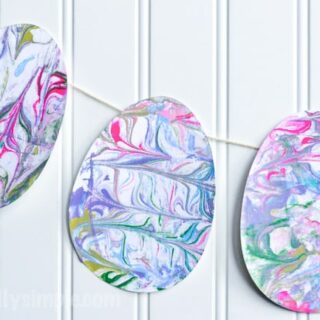
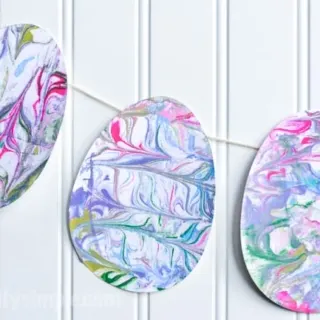
Marbled Paper Easter Eggs
Materials
- shaving cream
- card stock cut into egg shapes
- paint
- tray or box lid
- paint brush, toothpick, or fork
- newspapers
- paper towels
- scraper tool
Instructions
- Spray shaving cream onto a tray or box lid and spread it around evenly.
- Drop, squiggle, and squirt different colors of paint on top of the shaving cream.
- Using a toothpick or the end of a paint brush, start dragging the paint through the shaving cream making straight lines across.
- Continue to do this but go up and down through the paint and shaving cream this time to get the marbled look.
- Take a paper egg and press it on top of the paint and shaving cream, applying a bit pressure to push it into the mixture.
- Pull up the paper and place on newspapers, painted side up.
- Using a scraper tool, scrape off all of the shaving cream.
- Allow paint to dry and then hang the marbled paper Easter Egg creations!
This project was first shared as a contributor post on A Night Owl.
check out these other cute spring-inspired projects!
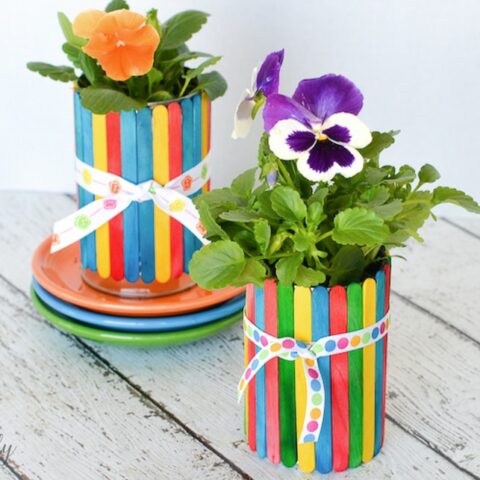
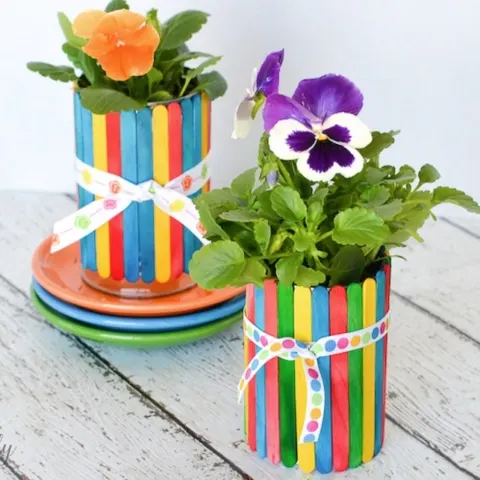
Craft Stick Flower Pots
A colorful spring project to make with the kids, these craft stick flower pots are a no-mess craft and make an adorable homemade gift!
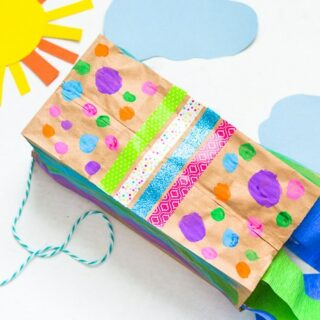
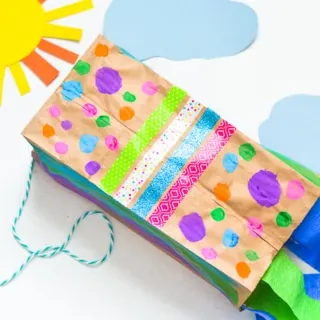
Paper Bag Kite Craft
This paper bag kite craft is a fun way for kids to welcome spring! And all will need are just a few basic craft supplies!
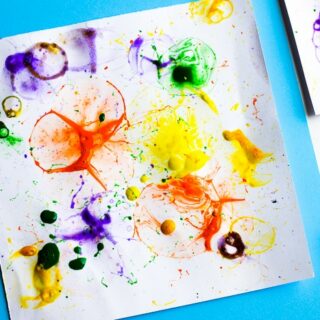
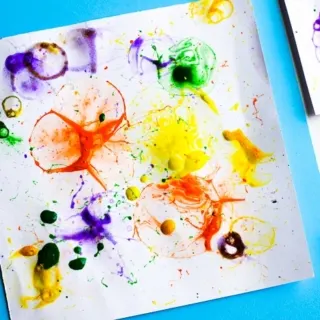
Bubble Painting
Bubble painting is a fun way to create art without a paint brush! With just a few basic supplies, these colorful paintings are easy to make with the kids.

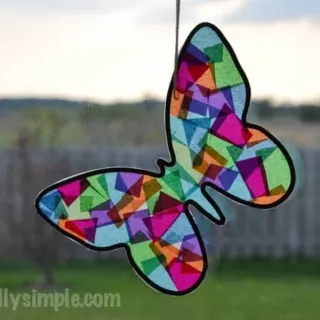
Stained Glass Butterfly Craft
This stained glass butterfly is simple to make and adds some color to your windows! A fun and colorful craft to welcome spring!